


Most exhibitors discover design problems with their canopy tent after it arrives at the show. The graphic does not align the way they imagined it. The proportions of the logo to the canopy face look different in real life than they did on a screen. The sidewall panels interact with the frame hardware in ways the supplier’s mockup did not show. By then, the money is spent, and the event is days away.
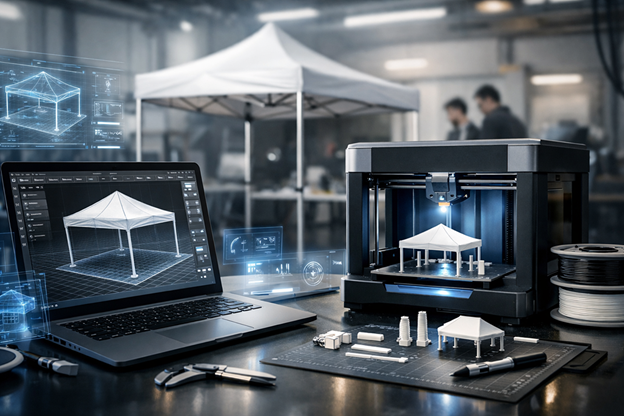
Prototyping solves this problem before it costs you. Using SelfCAD, a browser-based 3D modeling platform built specifically for non-engineers, and a consumer FDM 3D printer, any exhibitor can build a scaled physical model of their canopy tent configuration before placing a production order. This guide walks you through the process from zero modeling experience to a physical prototype you can hold in your hand.

Why Physical Prototypes Beat Digital Mockups for Canopy Planning
A digital mockup shows you what a canopy might look like from a fixed camera angle chosen by the supplier’s design team.
A physical prototype shows you what your canopy actually looks like from every angle, including the ones that matter most: directly above (how it reads from a second floor or mezzanine at a convention center), from 45 degrees at eye level (how it reads from approaching foot traffic), and from directly in front at a distance.
Scale models also reveal spatial problems that flat renderings hide. If you are planning to combine a 10×10 tent with sidewall panels and a banner stand at the entrance, a 1:24 scale prototype lets you physically arrange all three elements and immediately see whether the configuration creates an inviting entrance or blocks visibility into the booth.
The modeling time investment is two to four hours for a first-time user in SelfCAD. The print time for a 1:24 scale 10×10 tent frame is 6 to 8 hours on a standard FDM printer. The total cost of the filament is under two dollars. The cost of reprinting a misaligned full-size canopy graphic is several hundred dollars.
Getting Started in SelfCAD: The Canopy Tent Geometry
SelfCAD runs entirely in a web browser with no software installation required. Create a free account at selfcad.com and open a new project with metric units. Set your working scale to 1:24 for a 10×10 tent, meaning every 1mm in your model represents 24mm in real life.
Building the frame base
A standard 10×10 canopy tent frame consists of four corner leg assemblies connected by telescoping horizontal crossbars at mid-height and a folding roof truss system at the top. In SelfCAD, begin with the Cylinder primitive to model a single corner leg. Set the diameter to 4mm at your working scale (representing approximately 96mm or roughly 4 inches in real life, consistent with standard steel leg tubing). Set the height to 100mm (representing 2.4 meters).
Copy this cylinder four times and position each at the corners of a 100mm x 100mm square footprint. Use the Box primitive to model the horizontal crossbar connecting pairs of legs. At this scale, a box 100mm long, 3mm wide, and 3mm tall represents the crossbar accurately.
Building the roof canopy
The roof geometry is the most important modeling element because it is where your branding graphic lives. Use the Loft tool in SelfCAD to create a slightly peaked roof surface by defining two profiles: a 100mm x 100mm square at the base of the roof and a slightly smaller, slightly higher square at the peak. The resulting lofted solid represents the canopy fabric surface. Hollow it to a 1mm shell thickness using the Shell modifier.
Modeling the valance panels
The valance is the vertical drop panel at each face of the canopy roof. This is the primary branded surface on a printed canopy tent. Use the Box primitive to create a panel 100mm wide and 12mm tall (representing the standard 10-inch valance drop in real life). Position one at each face of the canopy, aligned to the roof edge.
Adding Brand Graphic Placeholders
Before printing, use SelfCAD’s surface painting tools or export the model to a slicer like PrusaSlicer or Bambu Studio and apply different filament colors to the valance panels versus the roof. This color differentiation lets you visualize where your logo and brand color will appear on the physical structure.
For a more detailed graphic simulation, print the canopy shell in white PLA, then print scaled paper graphics using your actual design at 1:24 size and attach them to the valance surfaces with light adhesive. This gives you a realistic representation of how the finished production canopy will look with your specific graphic content.
Printing and Assembly
Export your completed SelfCAD model as an STL file. Import it into your slicer software and set layer height to 0.15mm for adequate surface detail at this scale. Use 15 percent infill for the legs and crossbars where structural integrity matters, and 10 percent infill for the canopy shell. A 0.4mm nozzle produces adequate detail for all geometry at this scale.
Print each component separately: four legs, four crossbars, and the canopy shell. Assemble using cyanoacrylate adhesive, aligning the legs to the corners of the canopy shell base. The resulting model is robust enough to handle for spatial planning and client presentation.
Using the Prototype to Validate Your Order
Once the prototype is assembled, test these specific configurations before placing your production order with a supplier of custom canopy tents:
Logo size and position
Hold the prototype at arm’s length and check whether your logo reads clearly on the valance. If the logo is too small to identify at this scale, it will underperform on the full-size canopy at the distances that matter at events.
Sidewall and entrance configuration
If you are adding sidewall panels, model and print them as additional flat panels. Test different entrance configurations: full open front, half-wall sides, single sidewall. The physical configuration immediately reveals which setup creates the most inviting booth entrance.
Multi-tent layouts
If your event footprint uses two or more canopy tents side by side, print two complete prototypes and test the combined layout. Alignment of graphics across adjacent canopies, shared space management, and visual coherence across the combined footprint are all easier to evaluate on a physical model than in a digital rendering.
Why Canadian Exhibitors Should Source from Specialists
The prototyping process reveals exactly what you need before you order, which makes supplier selection more confident and precise. When sourcing your production canopy, working with a Canadian Owned Canopy Tents’ Brand means you benefit from local production standards, shorter lead times than import suppliers, and direct communication with production teams who understand the specific event environments and weather conditions Canadian exhibitors face.
The combination of a precise digital prototype validated through physical modeling and a production partner who understands your requirements gives you the highest probability of receiving a finished canopy tent that performs exactly as designed, on time, and without surprises.
To read more content like this, explore The Brand Hopper
Subscribe to our newsletter
Go to the full page to view and submit the form.