Last Updated on May 7, 2025 by Team TBH
A captivating headshot can open doors—whether it’s landing your dream job, growing your personal brand, or making a stellar first impression on LinkedIn. But not everyone has access to a professional studio or a background perfectly suited for a corporate portrait. Enter BG Remove, a free AI-driven background removal tool that transforms your casual snapshot into a polished headshot. In this step-by-step tutorial, we’ll cover everything from selecting the right image to exporting your final, career-boosting photo.
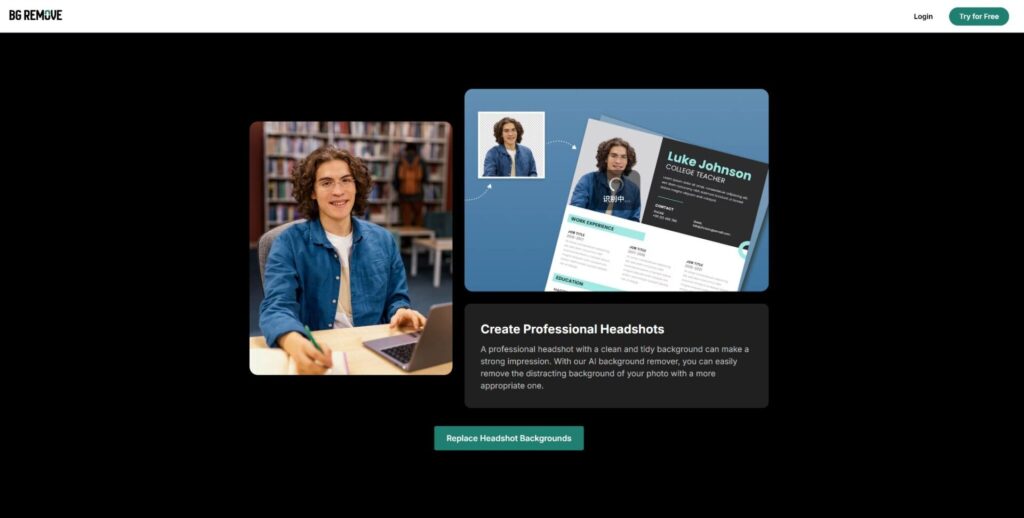
A Clean Background Matters
The Power of First Impressions
Your headshot often serves as a virtual handshake. Recruiters, clients, and networking contacts form subconscious judgments about professionalism and competence within seconds of seeing your photo. A cluttered background can derail that impression, drawing focus away from your face and distracting the viewer.
Traditional photo editors like Photoshop demand time, skill, and a paid license. AI tools like BG Remove automate the process, giving you precise results—without masking artifacts or halo effects. All it takes is a few clicks, and you’re on track to a headshot that holds its own against studio portraits.
Getting Started: Accessing BG Remove
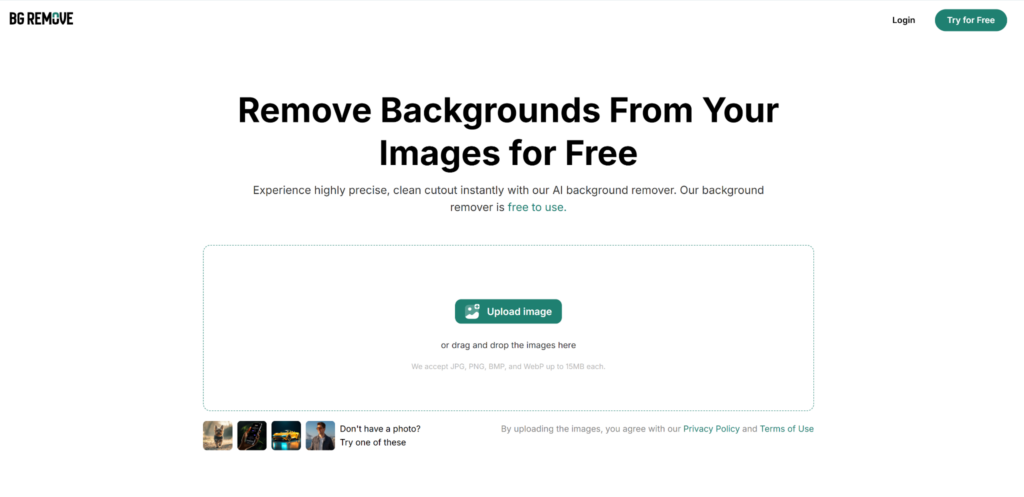
Step 1: Open the BG Remove Website
- Navigate to the BG Remove homepage at bgremove.com.
- You’ll land on a clean interface with a prominent “Upload Image” button—no account or download required.
Step 2: Upload Your Candidate Photo
- Supported Formats: JPG, PNG, WebP
- Max File Size: 50 MB
Click Upload Image and select a high-resolution photo where your face is clearly visible. Aim for a well-lit shot, ideally with even lighting on your face and minimal shadows.
Preparing Your Photo for Optimal Background Removal
Choose the Right Source Image
Lighting and Exposure
Good lighting is crucial. Soft, natural light (e.g., from a north-facing window) prevents harsh shadows around the chin and neck. Avoid overexposed or underexposed shots, as wild brightness or darkness can confuse the AI.
Composition and Framing
Center yourself in the frame with a bit of breathing room above your head and to the sides. Ensure your shoulders are visible. Crop out distractions—cluttered furniture or random objects—before uploading.
Removing the Background with BG Remove
Let the AI Do the Heavy Lifting
Automatic Background Extraction
Once your image is uploaded, BG Remove’s AI engine instantly detects the foreground subject (you!) and sets the rest of the image transparent. This usually takes under five seconds. You’ll see your headshot on a checkered (transparent) background, ready for the next step.
Inspecting the Cutout
- Zoom In to examine hair edges, eyeglass frames, and clothing details.
- Look for Artifacts such as stray pixels or rough edges.
Refining Your Headshot: Smoothing and Edge Touch-Up
Fine-Tuning the Edges
Feathering and Smoothing Tools
BG Remove includes simple sliders to soften or sharpen the mask edge. Slide Feather up to blend hair strands smoothly into the background, or dial down Feather for crisp suit lapels and eyeglasses.
Manual Eraser and Restore Brush
For any leftover artifacts:
- Eraser Brush: Paint over unwanted specks of background.
- Restore Brush: Recover any parts of your portrait that got trimmed too aggressively.
Choosing and Applying a Professional Background
Background Selection Strategies
Solid Colors vs. Subtle Gradients
- White or Light Gray: Timeless, keeps focus on you; ideal for corporate and LinkedIn.
- Soft Blue or Teal: Conveys approachability; popular in tech and creative industries.
- Gradient Backgrounds: Adds depth without distraction; can be matched to your personal brand palette.
Custom Background Uploads
If you have a branded backdrop or a specific image in mind:
- Click Upload Background.
- Select your PNG or JPG file.
- Adjust Scale and Position so the background complements your framing.
Previewing and Adjusting Your Composite
After selecting your background:
- Toggle between Before/After views to spot blending issues.
- Use the Move tool to nudge your headshot until framing feels balanced.
- Fine-tune Brightness and Contrast so the subject pops against the new background.
Advanced Tips and Tricks
Enhancing Your Headshot Post-BG Remove
Subtle Retouching
While BG Remove handles backgrounds, you might want to polish skin tone or remove minor blemishes. Quick online tools like Fotor or PicWish offer one-click retouch options. Use them sparingly to maintain authenticity.
Consistent Lighting Across Photos
If you’re producing a series of headshots (team page, directory), upload each to BG Remove and apply the same background and edge settings for a uniform look.
Aligning With Brand Guidelines
Incorporate brand colors or logos subtly in the background. A faint watermark of your company logo behind your shoulder can reinforce corporate identity without being intrusive.
Conclusion: Professional Headshots Made Simple
With BG Remove’s AI-driven background removal, crafting a studio-worthy headshot is no longer the exclusive domain of high-end photographers and Photoshop wizards. By following this guide—selecting the right image, letting the AI perform precision cutouts, fine-tuning edges, and choosing a polished backdrop—you can generate standout headshots that boost your online presence and career opportunities. Best of all, BG Remove’s free, browser-based platform ensures you can create, tweak, and export your professional portraits anytime, anywhere, with just a few clicks.
Take control of your digital image today: upload your photo to BG Remove, apply these techniques, and watch how a clean, distraction-free headshot can transform your personal brand.
To read more content like this, explore The Brand Hopper
Subscribe to our newsletter